So let us start ->
First you have to create a Shared Services Provider if it is not created in your central administration site. Then follow these steps –
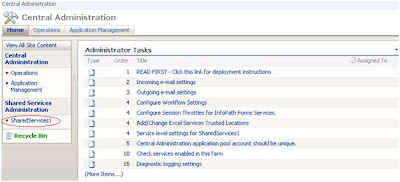
1) Login in Central Administration site.
2) You will be able to see SharedServices1 link in left navigation menu under Shared Services Administration. This link name will depend what you have given in ssp name while configuring Shared services provider.
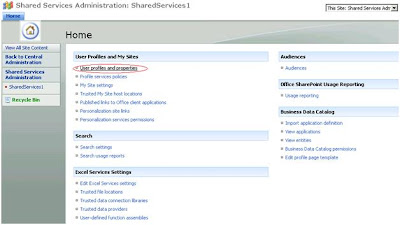
3) After clicking this -> you will be navigated to shared services administration screen for your SSP. You will be able to see all these section shown below. Click on “User Profiles and properties” link under User Profile and My sites section to import user profiles from the directory.
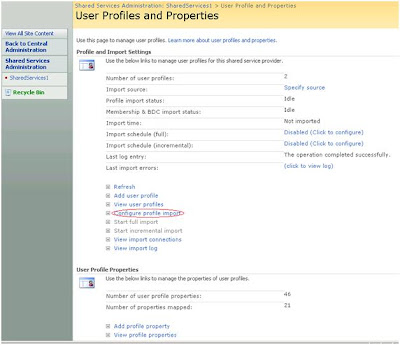
5) You will find one link "View Import Connection". On click of this link, new page will open. This page will have one button "Create new Connection". Click on this -> Add connection screen will be opened.
You have to fill all these parameters.
a. Connection string type – Give Active directory.
b. Domain Name – provide appropriate domain name.
c. Select "Auto discover domain controller".
d. Port number and time out will come automatically. So do not change that.
e. Click on "Auto fill root search base". It will fill the default details in below section automatically.
f. Change user filter criteria according to your requirement. This is a LDAP query. You will find this on other blogs that how to build the LDAP query.
g. Check on Sub tree for all levels search.
h. Under authentication information specify account name which has read permission for active directory. You can choose default account also.
7) you will find the previous screen with one new connection created which you can edit and save again.
8) Go back to "Configure Profile Import" screen and fill the details. Click on full import and increment import. Schedule it according to your requirement.
9) For current full import -> Click on Start full import in "User Profile and Properties page".
10) You will be able to see your crawl result on this page only. After getting it completed. Go to view profile. You will be able to see all user profiles which have been imported.
11) Done:)


Then how do we configure profile import ?
ReplyDeleteYeah...Updated...
ReplyDeleteThis comment has been removed by a blog administrator.
ReplyDeletekeep it up...
ReplyDeletetooo good
ReplyDeleteGood job....
ReplyDeleteits really help full for learner....
importer database Wow, cool post. I'd like to write like this too - taking time and real hard work to make a great article... but I put things off too much and never seem to get started. Thanks though.
ReplyDelete